
Customizing Jekyll with the Minimal Mistakes theme
In the previous post we scaffolded a site using the Jekyll CLI.
In this post, I will show you how to customize the look and feel of the site by installing the theme Minimal Mistakes by Michael Rose.
In the post I will be using the acronym MM and the full name Minimal Mistakes interchangeably.
Introduction on themes
Jekyll has a built-in support for themes that allows you to use templates created by the community.
The theme system is designed so themes are packaged into Ruby gems but assets and layouts can easily be overridden to customize the site’s content.
For sites hosted on GitHub Pages, there is also the possibility to consume the theme directly from a GitHub repository.
The Jekyll documentation has an article that explains how the theme system works.
Installing the theme
Because it supports the remote theme setup, installing the Minimal Mistakes theme is pretty easy.
You simply modify the _config.yml file so that it contains the following entry and you any other theme-related entry.
remote_theme: mmistakes/minimal-mistakes
A more detailed guide on how to install the Minimal Mistake theme can be found on the site of the theme itself.
Additionally, you can use the minimal_mistakes_skin property to select which of the many skins available you prefer for your site.
Finally, as explained by Matthias Lischka in his blog, it’s a best practice to fork the repository and have the remote_theme directive pointing to your own fork of the repository.
This is the directive in my _config.yml file:
remote_theme: kralizek/minimal-mistakes
Customizing the site
Once the theme is installed, it’s time to customize the site to make it ours.
Following Jekyll’s best practices, Minimal Mistakes puts a lot of emphasis on the Liquid templates and data provided by the _config.yml, the data files and the Front Matter of each page.
Footer
Let’s start with something easy: the footer.
The footer presents some links that can help visitors contacting you.
This is my footer as of the time of writing this article:

You can see that my footer shows five links: GitHub, LinkedIn, Twitter, Stack Overflow and the RSS feed.
These links are created programmatically at build time and are based on a data structure placed in the _config.yml file.
Here is the snippet that is used to render the footer of the website.
footer:
  links:
    - label: "GitHub"
      icon: "fab fa-fw fa-github"
      url: "https://github.com/Kralizek"
    - label: "LinkedIn"
      icon: "fab fa-linkedin"
      url: "https://www.linkedin.com/in/renatogolia/"
    - label: "Twitter"
      icon: "fab fa-fw fa-twitter-square"
      url: "https://twitter.com/Kralizek"
    - label: "Stack Overflow"
      icon: "fab fa-fw fa-stack-overflow"
      url: "https://stackoverflow.com/users/82540"
Each item is represented by a name, a FontAwesome icon and a link.
Author
The Minimal Mistakes theme has an area where you can tell your visitors a little about yourself.
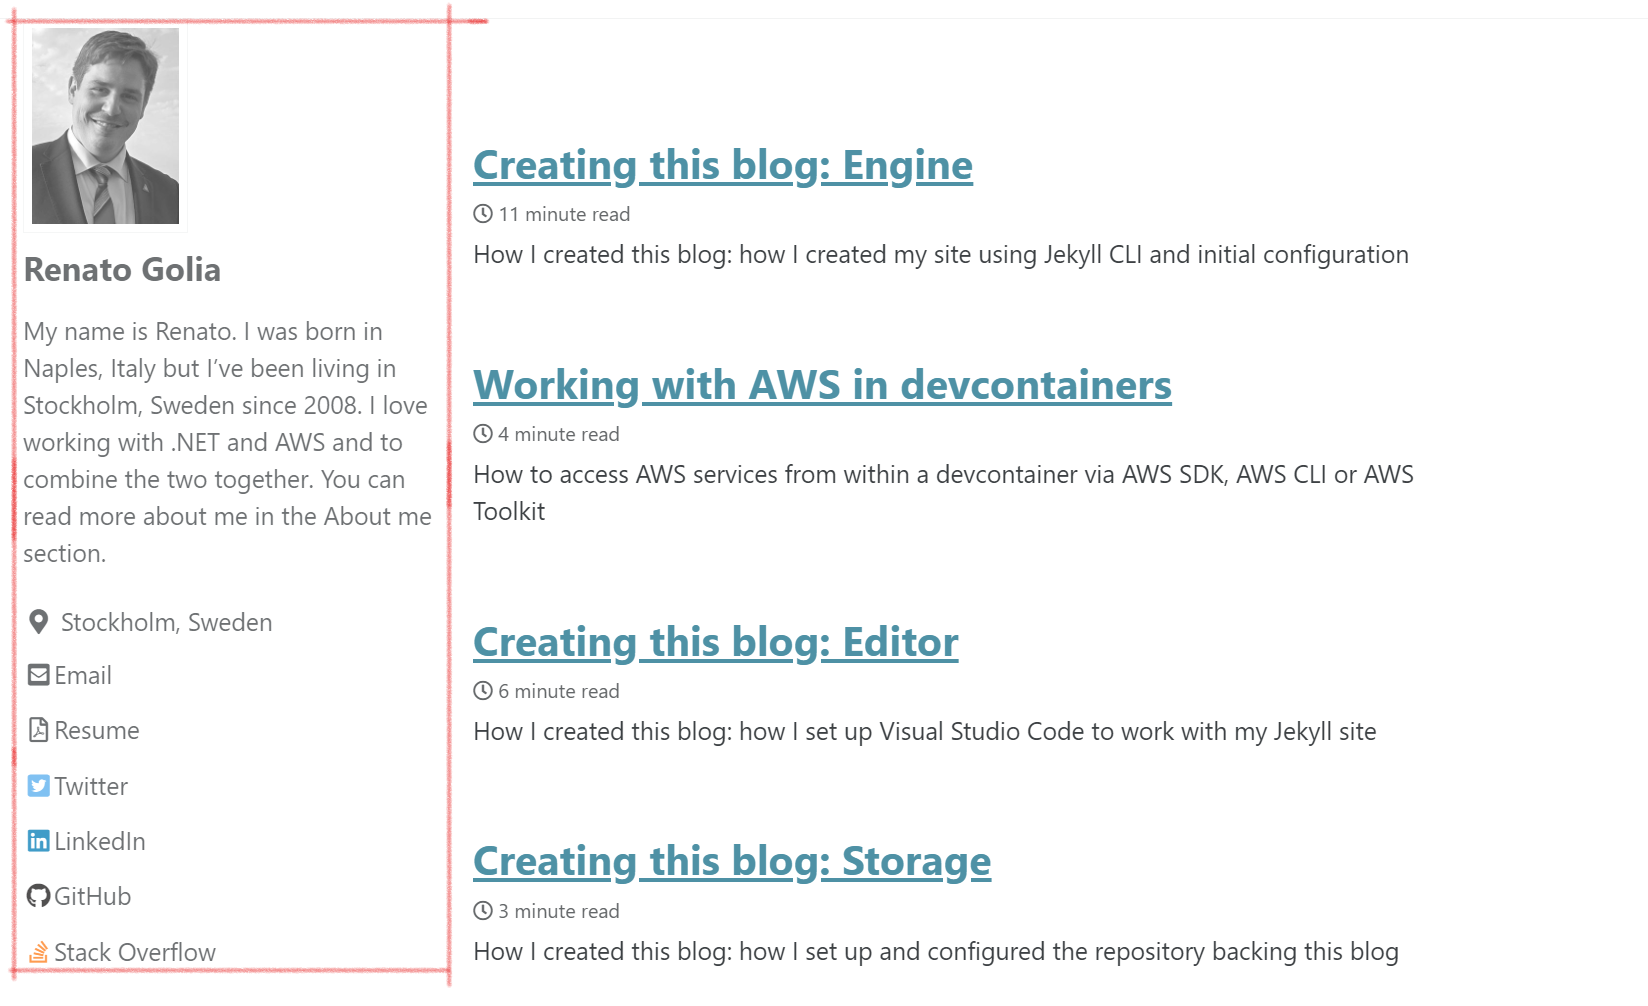
Like the footer, this area can be customized in the _config.yml section.
Here is the snippet that is used to render the author area of the website.
author:
  name   : "Renato Golia"
  avatar : "/assets/images/rg.jpg"
  bio    : >-
    My name is Renato.

    I was born in Naples, Italy but I've been living in Stockholm, Sweden since 2008.
    I love working with .NET and AWS and to combine the two together.
    You can read more about me in the [About me](/about/) section.
  location: "Stockholm, Sweden"
  twitter: "Kralizek"
  linkedin: "renatogolia"
  github: "Kralizek"
  stackoverflow: "82540"
  links:
    - label: "Email"
      icon: "fas fa-fw fa-envelope-square"
      url: "mailto:renato@golia.tech"
    - label: "Resume"
      icon: "far fa-fw fa-file-pdf"
      url: "/assets/files/resume-renato-golia.pdf"
As you can see, the theme natively supports some social media sites like Twitter, LinkedIn, GitHub, Stack Overflow. Here you can see all the social media that are natively supported.
For all others, you can use the links collection.
The theme also supports the possibility to display a different author for each post. This is very convenient if your blog welcomes external authors. Here you can see how to support multiple authors.
Top bar menu
Until now, we’ve been modifying the _config.yml file to customize how the site looks and which information is displayed.
The configuration of the top bar, also known as Masthead in MM’s lingo, lies in the navigation.yml data file that you can find in the _data folder.

In the screenshot above, I highlighted two areas.
The one on the left simply displays the content of the site.title setting that can be customized in the _config.yml.
The area on the right, instead, renders the structure available in the site.data.navigation.main variable.
To be more precise: the variable main found in the navigation.yml file in the _data directory.
Here is the relevant excerpt of the file.
main:
  - title: "About me"
    url: /about/
  - title: "Posts"
    url: /years/
  - title: "Pages"
    url: /pages/
  - title: "Tags"
    url: /tags/
Like in most responsive websites, the Masthead section moves items into a toggle menu when there is not enough space to display all elements.
You can peek at the file responsible for rendering the Masthead to see how it’s implemented.
The website of Minimal Mistakes has a simple animation that explains this feature.
Further modifications
Once we’ve modified the basics of the look and feel of the site, it’s time to focus on some less obvious details.
Favicons
Favicons initially were the icons displayed by browsers in the address bar. Over time, with the growing popularity of PWA and similar technologies, favicons are used when the website is pinned on the desktop, on the home screen of a mobile device and so on.
For this reason, it’s important to have a proper support for it.
Unfortunately, the beauty of standards is that there are many, so each device/operative system/platform has their own standard to follow.
Anyway, the bare minimum is to have a favicon.ico file in the root of your website. This file will be requested from the browsers regardless if the HTML page has an explicit link to any icon.
Once you have you have your icon file, you can use RealFavIconGenerator to generate all the other files you need.
You can also use it to check if your site is set up correctly. Here is a report for this site.
Personally, I’ve placed all files with the exception of favicon.ico in the directory /assets/images/favicons/. This approach allows me to keep the root of the site (and therefore of the repository) quite clean.
Now that the files are in place, we need to modify the website so that it includes the proper HTML to link to them.
To do so, simply create a file with this path /_includes/head/custom.html and paste the following content (actually the one suggested by RealFavIconGenerator).
<link rel="apple-touch-icon" sizes="180x180" href="/assets/images/favicons/apple-touch-icon.png">
<link rel="icon" type="image/png" sizes="32x32" href="/assets/images/favicons/favicon-32x32.png">
<link rel="icon" type="image/png" sizes="16x16" href="/assets/images/favicons/favicon-16x16.png">
<link rel="manifest" href="/assets/images/favicons/site.webmanifest">
<link rel="mask-icon" href="/assets/images/favicons/safari-pinned-tab.svg" color="#5bbad5">
<link rel="shortcut icon" href="/favicon.ico">
<meta name="msapplication-TileColor" content="#e5e5e5">
<meta name="msapplication-config" content="/assets/images/favicons/browserconfig.xml">
<meta name="theme-color" content="#ffffff">
If you are wondering how this could solve the issue, Jekyll gives priority to local files over files found in the repository pointed to by our remote_theme setting. This is the file we are overriding.
HTTP cache busting
If you find yourself working a lot with the CSS of the site, you might find annoying the long caching set for static assets.
To circumvent the caching, we can instruct Jekyll to create a new URL for the main CSS file every time we rebuild the site. This is something you should disable when you have finished tinkering with the CSS.
We will be using the same process used for the favicon links: we are going to create a new file that will override the file found in the repository.
Unlike for the favicon links, the modification we are going to introduce was not planned by the author of Minimal Mistakes.
First thing first, let’s create a file whose path will be _includes/head.html and let’s copy the content of the original file.
Then, let’s replace the line where the main.css file is linked with the following one:
<link rel="stylesheet" href="/assets/css/main.css?v=1776114332">
The section we have added, v=1776114332, simply adds a querystring token based on the time of build.
Every time we build the site, that token will be recalculated, giving us the possibility to skip caching layers and access the fresh CSS file as soon as possible.
Google Analytics
Minimal Mistakes has the support for tracking providers like Google Analytics built-in.
To enable this, simply go into the _config.yml and add the following snippet:
analytics:
  provider: "google"
  google:
    tracking_id: "your-ga-tracking-id"
    anonymize_ip: true
Adding this snippet will cause Jekyll to render the needed code to include the Google Analytics snippet.
The theme also supports other providers or, if your provider of choice is not supported, a custom HTML snippet.
Recap
In this post we’ve seen how Jekyll supports themes and how they can be installed.
Specifically, we have installed and configured the theme Minimal Mistakes by Michael Rose.
Then we have customized it so that it matches our needs and tastes.
This is the last post of this series but more posts will come about Jekyll in the future.
Support this blog
If you liked this article, consider supporting this blog by buying me a pizza!